Geography
85
Applications on GeoSpatial Technology
Using the GIS Steps - Case Study
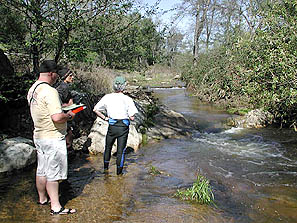
Secret Ravine runing through the campus nature area
Before you start your GPS data gathering, you must ask three (3) simple questions.
- What are the geographic
features you'd like to create for your map? (Examples: roads & trails,
a streambed course, perimeter of parking lot, extent of a sand bar, riffles
in the stream, erosion sites, invasive or exotic plant species locations.)
The must be one of three type of geographic features, known as points, lines
and polygons (areas).
See if you can't figure out which ones fit each category. You will need to decide this based on your needs, but as a general rule of thumb you will have mostly lines and points, with some polygons. For example, we learned that attempting to GPS small pools within the stream was hard to do, given their size and depth. They were better represented as points. For large patches of invasive plants, like thorny blackberries mixed in with poison oak, you might very well not be able to walk around these features. Remember, what ever feature you choose to collect and map, you must walk with the GPS unit. - Beyond just finding the
location of a point, line or area feature, you must ask another very important
question -- what do you want to know about each features. This is known as
the "attributes". For example, for the feature "roads & trails",
you certainly want to know how wide is the road & trail. Or perhaps you
would want to know what is the condition, or the surface type. Perhaps you
even want to know if the path (or tread) is narrower than the original road,
such as an abandon dirt road that has now become a narrow beaten path. Any
scenario you can imagine, it will probably happen at some point. Finally,
use short attribute names as they will ultimately be used as table column
headings (e.g. "width", "condition", "surface").
- Finally you want to know the "values" for each attribute. For example, for the width of "roads & trails", you have to assign a value. Often this is a menu of choices, which makes it easier to enter values in the field. For example, for roads width choose something like: <4', 4-6', 6-10', 10+. For condition of roads, perhaps "poor" and "good" will work. Avoid "yes" and "no" answers used for values. Instead use multiple values -- for example -- for road surface use something like: concrete, asphalt, gravel, dirt, decomposed granite (abbreviated it to "decom gran", or something like this). Finally, with short abbreviations for your attributes and values, you can explain them in another document called a "data dictionary".
Creating a Data Dictionary and More
Next you'll create a data
dictionary in Trimble's Pathfinder software. This is the main tool to
manipulate GPS data in the office or on a laptop computer. The program is intuitive,
but it's best to have some guidance. Then you're ready to go into the field.
Instruction included are: (1) creating a Data Dictionary, which you must do
beforehand; (2) transferring your data dictionary to the GPS unit; (3) using
the Trimble GeoExplorer GPS unit, but note this is specific to this unit;
(4) transferring "rover" files back to the computer so you can see
what you've mapped; and (5) correcting the rover files location accuracy. Finally
you'll see important ways to (6) export files to a GIS program in the desired
grid and projection system.
- Creating a Data Dictionary
- Transfering Data Dictionary
- Working with the GPS unit
- Transfering files back to computer
- Differential Correction
- Exporting to GIS friendly file
- Create a simple sample Map
And then read “MROSD GPS/GIS Pilot Project ..."